Cart
0
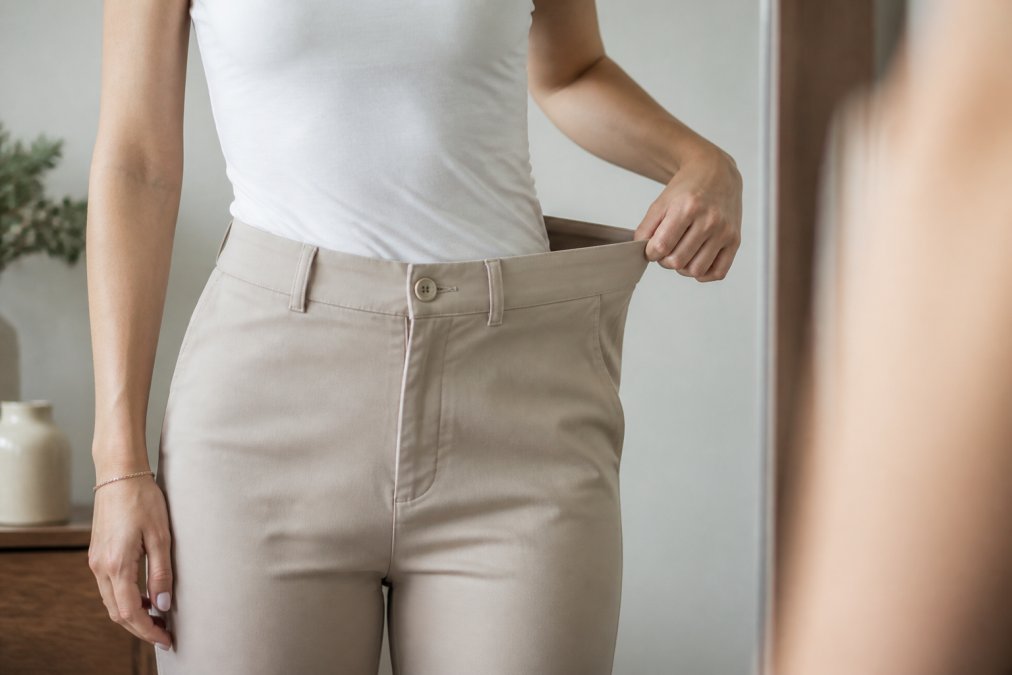
Table of Contents
- Why Your Pants Gap at the Waist (and Why It's Not Your Fault)
- How to Measure the Waist Gap Before You Fix It
- How to Take In the Waist of Jeans Without Sewing
- Sewing Methods: Darts, Elastic, and Taking In the Waistband
- Waist Gap Fixer Tools: Buckles, Buttons, and Adjusters
- Best Jeans for Curvy Figures That Don't Gap
- Preventing Waist Gaps: Fit Guide for Jeans vs. Trousers
- Conclusion
- Frequently Asked Questions
Last Updated: September 13, 2026
Why Your Pants Gap at the Waist (and Why It's Not Your Fault)
If your jeans fit at the hips but you're dealing with a pants gaping waist at the back, the problem isn't your body; it's how mass-produced pants are patterned. This guide from Urban Mode Wear Store explains how to stop pants from gaping at the waist, from no-sew fixes to permanent tailoring.
Most brands cut pants for a straight hip-to-waist ratio, but real bodies rarely follow that formula. If your waist is much narrower than your hips, the waistband has nowhere to go but out, creating a gap that shows your back and ruins the line of a tucked-in top.
The good news: this is fixable, often in under ten minutes.
The Hip-to-Waist Ratio Problem
The gap comes down to a measurement mismatch. A hip-to-waist ratio is the difference between your hip and natural waist circumferences, and it determines how much the waistband needs to curve inward.
When a brand drafts one pattern for a size range, it assumes a fixed ratio. If your ratio is wider than that assumption, the waistband sits away from your back, which is why the same size can fit your hips beautifully while floating at the waist.
Fabric and Fit Issues That Cause Gaping
Fabric behavior matters as much as measurements. Stiff, unwashed denim resists curving to your body, so the gap stays open, while soft, stretchy fabrics mold closer over time.
Other fit issues that widen the gap:
- A waistband cut straight across instead of curved
- Low-rise styles that sit below your natural waist
- No darts or shaping seams at the back
- A waistband with no stretch in an otherwise stretchy pair
How to Measure the Waist Gap Before You Fix It
Before any waist gap fixer goes on, measure the excess so you know how much fabric to remove. Pinch the gap at the center back while wearing the pants, then measure the pinch with a soft tape.
Guessing is a common mistake: pinch too little and the gap returns, too much and the waistband puckers. Most gaps fall between half an inch and two inches, and that number tells you whether a no-sew fix will hold or you need real tailoring.
How to Take In the Waist of Jeans Without Sewing
Learning how to take in the waist of jeans without sewing starts with one tool: an adjustable button pin or invisible adjuster. These attach inside the waistband and pull the two sides together, no needle required.
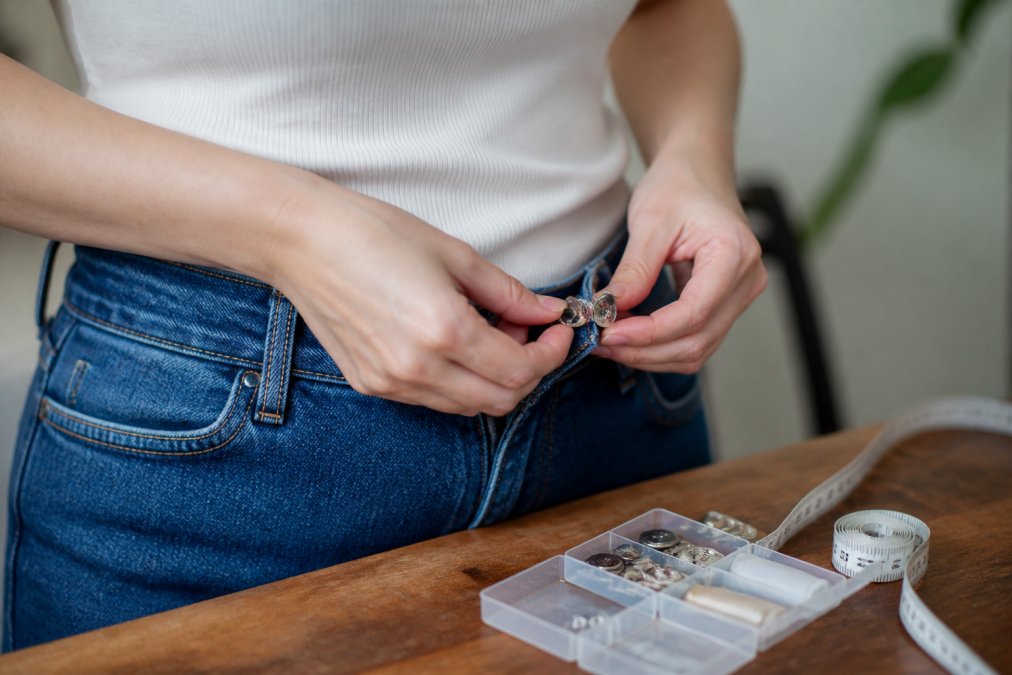
Here's the fastest method:
- Put the jeans on and pinch the gap at the back.
- Mark where the two sides meet with a pin.
- Push the button pin through the inner waistband at that mark.
- Hook it to the opposite side and adjust until the waist sits flat.
No-Sew Options That Actually Hold
Not every no-sew fix survives a full day. The ones that hold create tension across the whole waistband rather than at one point.
- Button pins: Fast, invisible, and reversible. Best for gaps under an inch.
- Invisible adjusters: A buckle-style clip that cinches both sides evenly.
- Elastic loops: Threaded over the existing button to pull the waist tighter.
Pro Tip
For gaps wider than an inch, use two button pins spaced a few inches apart instead of one. A single pin concentrates stress and pops off; two distribute the tension and stay put through a full day of wear.
How Long Do No-Sew Fixes Last?
No-sew fixes are temporary by design. A button pin holds through a day of wear but can slip during heavy movement or washing; elastic loops last longer but stretch out. For a permanent result, sewing is the only durable answer, treat no-sew options as a quick solve for one outfit, not a long-term alteration.
Sewing Methods: Darts, Elastic, and Taking In the Waistband
Sewing gives you a professional finish that survives years of washing, but the right method depends on how much fabric you're removing, where the gap sits, and the fabric itself. A dart that works on stretch denim will pucker a lined wool trouser, and an elastic channel that disappears into a pull-on style will bulge under a tailored waistband. Here's how each method behaves, and when to reach for it.

Darts: Best for Gaps Under Two Inches
A dart is a small triangular seam sewn into the back waistband and the fabric below it. Two darts, one on each side of the center back, pull the waistband inward without touching the side seams or hip fit.
- Mark the dart: Put the pants on inside out, pinch the gap closed, and pin. Transfer the pinch to the inside with tailor's chalk. Each dart should taper from the waistband edge down to a point about three to four inches below (sewing.org).
- Stitch: Set your machine to a standard straight stitch, around 2.5 mm. Backstitch at the waistband edge and again at the dart point.
- Press: Press the dart flat toward the center back. On stiff denim, press from the wrong side with steam; skipping this step is the most common reason darts show through the back of the pants.
Darts are the easiest sewing fix to reverse: pick out the stitches and press the fabric flat, and the pants return to their original size, useful if your weight fluctuates.
Elastic Insertion: Best for Pull-On and Casual Styles
Threading elastic through the back waistband channel gathers excess fabric evenly instead of in one spot. This works only if the waistband already has a channel, a casing sewn into the band, or a folded-over band with room to thread through.
- Open the channel: Use a seam ripper to open a small slit in the inside of the back waistband, about an inch from a side seam.
- Thread: Attach a safety pin to one end of a length of 1/4-inch or 3/8-inch elastic and feed it through the channel.
- Anchor and adjust: Pin both ends, try the pants on, and pull the elastic until the waist sits flat. Stitch the ends down with a few passes of a zigzag stitch.
Elastic is semi-reversible. You can cut it out later, but the slit you opened in the casing will remain unless you stitch it closed.
Center Back Seam: Best for Large Gaps and a Clean Finish
Removing the waistband, trimming the center back seam, and reattaching the band is the cleanest result for gaps wider than two inches. It's also the most involved.
- Remove the waistband: Use a seam ripper to detach the waistband from the back, working from one side seam to the other. Keep the band intact.
- Take in the center back: Pin the two back panels together along the center back seam, removing the measured excess. Stitch, then trim the seam allowance and press it open.
- Reattach: Pin the waistband back in place, easing it to match the new, narrower back. Stitch along the original stitch line.
This method is hardest to reverse because the fabric is trimmed. If reversibility matters, leave a wider seam allowance untrimmed so you can let the seam out later.
Fabric-Specific Adjustments
- Stretch denim and stretch blends: Use a ballpoint or stretch needle and a slight zigzag stitch so the seam moves with the fabric instead of snapping. Reduce presser foot pressure if your machine allows it.
- Lined trousers: Open the lining at the back seam first, make your alteration on the shell fabric, then re-stitch the lining by hand with a slip stitch so it doesn't pucker.
- Delicate fabrics (silk, lightweight wool, rayon): Use a fine needle (size 60/8 or 70/10), a shorter stitch length, and tissue paper under the seam to prevent the fabric from being pulled into the needle plate (sewing.org).
- Heavy wool or coating: A walking foot helps feed the thick layers evenly. Press with a clapper to set the seam flat.
Tools You Actually Need
- Sewing machine with a straight and zigzag stitch
- Matching thread (polyester all-purpose is fine for most fabrics)
- Seam ripper
- Tailor's chalk or a washable fabric marker
- Pins or clips
- Hand-sewing needle for finishing linings
- Iron and pressing surface
Pro Tip
Sew a test dart on a scrap of the same fabric before touching the pants. It takes two minutes and tells you whether your stitch length and needle are right for that material.
Watch Out
Never alter the side seams to fix a waist gap. Side-seam adjustments change the hip and thigh fit, which is usually the part that already fits well. Always work from the center back.
Waist Gap Fixer Tools: Buckles, Buttons, and Adjusters
A waist gap fixer is any small device that pulls the waistband tighter without altering the fabric. These are the tools worth keeping in a drawer.
| Tool | Best For | Reversible | Durability |
|---|---|---|---|
| Button pin | Gaps under 1 inch | Yes | One day of wear |
| Invisible adjuster | Even cinching, dress pants | Yes | Several wears |
| Elastic loop | Casual button-front jeans | Yes | Weeks |
| Sewn darts | Permanent fix, any gap | No | Years |
The trade-off is clear: no-sew tools are reversible and instant, while sewing is permanent and durable. For pants you wear weekly, sewing wins. For a one-off event, a button pin is enough.
Best Jeans for Curvy Figures That Don't Gap
The best jeans for curvy figures are cut with a curved waistband and a true hip-to-waist ratio, so the gap never forms. Shopping for the right construction beats fixing the wrong pair.
Look for these features:
- A contoured or curved waistband
- Stretch denim with enough recovery to hold shape
- Higher rises that sit at your natural waist
- Adjustable or elastic waistband options
At Urban Mode Wear Store, our Women's Adjustable Waist Cargo Straight Jeans are built with an adjustable waist so you can dial in the fit yourself. For an everyday pair that skips the gap entirely, the Women's Pull-On Denim Cargo Pants with an elastic stretch waist remove the rigid waistband problem altogether.

Key Takeaway
The single most reliable way to avoid waist gaping is to buy pants with a curved or adjustable waistband. Fixing a straight-cut waistband is always harder than starting with one designed to fit curves.
Preventing Waist Gaps: Fit Guide for Jeans vs. Trousers
Prevention looks different for denim than for trousers, and different again depending on your hip-to-waist ratio. "Buy a curved waistband" is correct but incomplete, here's how to shop for it, and how to know when you need a different style rather than an alteration.
Start With Your Hip-to-Waist Ratio
Measure your natural waist (narrowest point, usually just above the navel) and your hips (fullest point), then divide hip by waist. That number tells you how much curve a waistband needs.
- Under 1.2: A straight or slightly curved waistband will usually sit flat.
- 1.2 to 1.4: You're in the range most mass-market patterns are drafted for. A curved waistband helps but isn't always required.
- Above 1.4: You have a pronounced hip-to-waist ratio. Straight-cut waistbands will gap on you almost every time, and you should prioritize contoured waistbands, adjustable waists, or styles cut with darts at the back.
Knowing your number changes the decision. Above 1.4, no amount of sizing down fixes a straight waistband, you'll just end up too tight at the hips. Shop for construction, not size.
What to Look For in Jeans
Denim is stiff and holds a gap open, so construction matters more here than in any other fabric.
- Contoured or curved waistband: The band is cut in an arc rather than a straight strip, so it follows the inward curve from hip to waist.
- Stretch with recovery: Look for denim with at least 1-2% elastane or Lycra (textileschool.com). "Recovery" means the fabric snaps back to shape instead of stretching out over a day of wear, a pair with stretch but no recovery will gap worse by evening.
- Higher rise: A mid- or high-rise waistband sits closer to your natural waist, where the curve is more pronounced. Low-rise styles sit below it and gap more easily.
- Back darts or a shaped yoke: A yoke seam that angles inward, or visible darts at the back waistband, is a sign the pattern was drafted with curve in mind.
- Adjustable waist tabs: Some jeans and cargo styles include hidden elastic or button tabs inside the waistband. These let you dial in the fit without sewing.
What to Look For in Trousers
Softer trousers drape and shape more easily, but show puckers and wrinkles more readily. The construction cues are different.
- Lined vs. unlined: Lined trousers hide the inside of the waistband, which means a center-back seam alteration won't show. Unlined trousers require a cleaner finish.
- Fabric weight and drape: Lightweight wool, crepe, and rayon drape close to the body and can mask a small gap. Stiff cotton twill behaves more like denim and needs the same curved-waistband treatment.
- Back waist darts: Many tailored trousers already include two back darts. If yours do, a tailor can deepen them rather than adding new ones.
- Side or back elastic inserts: Some dress trousers hide a small elastic panel at the back waist. These are common in pull-on and comfort-waist styles.
Fabric-Specific Shopping Notes
- Stretch blends: More stretch isn't always better. A blend with high stretch and low recovery will bag out at the waist by the end of the day. Look for "recovery" or "shape retention" in the product description.
- Delicate fabrics (silk, fine wool, rayon): These drape well but pucker easily if altered. If you're between sizes, size up and have a tailor take in the waist rather than sizing down and stressing the seams.
- Lined trousers: Always check whether the lining is attached at the waistband or free-hanging. Free-hanging linings are easier to alter.
- Heavy fabrics (coating, thick denim): These resist curving to the body. A contoured waistband is almost mandatory if you have a pronounced hip-to-waist ratio.
When a Different Style Beats an Alteration
If your hip-to-waist ratio is above 1.4 and straight-waistband pants keep gaping, the fix isn't sewing, it's shopping differently. Look for:
- Pull-on styles with elastic waists
- Adjustable-waist cargo and utility pants
- High-rise styles with contoured waistbands
- Brands that publish their hip-to-waist ratio for each size
An alteration can only remove so much fabric before the back pockets and yoke distort. If a tailor says the gap is too large to take in cleanly, change the style, not the seam.
Key Takeaway
The single most reliable way to avoid waist gaping is to buy pants with a curved or adjustable waistband. Fixing a straight-cut waistband is always harder than starting with one designed to fit curves.
Conclusion
A waist gap is a pattern problem, not a body problem, and every fix here works from the center back where the excess lives. Urban Mode Wear Store builds pants with flattering fits for every curve, including adjustable and elastic waistbands that skip the gap from the start. Explore our premium denim and pant sets, crafted with quality materials and timeless design, and find a pair that fits the way it should. Add to Cart and stop fighting your waistband.
Frequently Asked Questions
How can I fix the waist gap in my pants?
You can fix a waist gap with a no-sew button pin, an adjustable buckle, or by sewing darts into the waistband. For a temporary fix, try an invisible adjuster or a belt. For a permanent solution, take the pants to a tailor or use a sewing machine to take in the waistband. Always measure the excess fabric first so you remove the right amount.
How to fix waist gap in pants without sewing?
No-sew fixes include button pins, adjustable buckles, and elastic bands that clip onto the existing button. These work well for denim and trousers with a standard button closure. They are reversible and beginner-friendly. However, no-sew fixes may loosen over time, so check them after each wear. For a long-term hold, sewing darts or taking in the waistband is more durable.
Why do my jeans always gap at the waist?
Jeans gap when your hip-to-waist ratio doesn't match the brand's standard sizing. If your hips are wider than your waist, the jeans fit your hips but leave extra fabric at the waist. Fabric also matters: rigid denim gaps more than stretch denim. A tailor can take in the waistband, or you can choose jeans designed for curvy figures with a higher rise and contoured waistband.
What is the best way to tailor pants for a curvy figure?
For curvy figures, the best approach is to take in the waistband at the back seam or add darts. This preserves the hip fit while removing excess fabric at the waist. A tailor can also add elastic to the back waistband for flexibility. If you prefer DIY, start with a no-sew adjuster, then move to sewing darts once you know the exact amount to remove. Always test the fit before cutting fabric.